Nail Art Techniques - Step by Step Guide
Do you want to learn how to spice up the look of your nails, beyond the simple nail polish? Nail art can add stunning flair to how your nails look and provide a beautiful way to complement your outfit for a special event.
While highly detailed and complex nail art has to be done by a professionals, there are a few simple nail art techniques which you can apply to your own nails or those of a friend, at home.
With patience, determination and some practice you can learn the techniques for creating beautiful nails.
What You Need for Nail Art
- A good quality set of art grade acrylic paint are a good idea. Nail varnish of various colours can be used but it makes the job harder and clogs up the brushes. Varnished take longer to dry and are thicker and harder to apply, particularly with a brush. Acrylics are much simpler to use as they are light, less thick and flow more easily. Always apply a base coat to stop staining.
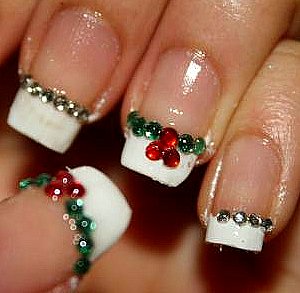
- Various adornments such as rhinestones, chain links, jewelry items and glitters are a good idea and they are easy to obtain. Keep on the look out for these items to add to your collection.
- Make certain you have a good variety of nail varnishes of diverse colours.A good topcoat is a necessity for nail art to seal and preserve the design.
- Buy a pack of false nail tips to practice on - it saves messing about with your own nails, which can be very frustrating. Apply the tips to cocktail attach or other items. You can contain the attach while you decorate on the nail!
- Do some research to find the designs you want for your nails and draw outlines on the false nail tips to prepare the design.
The Basic Principles
- Start with nails that are healthy, trimmed and in good shape. You don't need a major manicure but you should ensure your nails are clean and have an even and symmetrical shape. The cuticles need to be healthy, clean and soft.
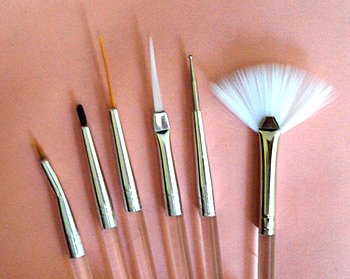
- Prepare well beforehand and have everything ready and at hand. Buy a set of semi-professional nail art tools that encompass all the stripers, paint brushes, marbling devices, dotters and spreaders and various other implements. Don't be concerned if not all the tools are available as you can easily improvise. For example you can use bobby pins or toothpicks to request spots and to add swirls or hue with precision. You can furthermore buy fine-tipped art paint brushes at your localized craft shop that are adequate alternatives. Make certain you have adequate supplies of acetone for rapidly dealing with errors, and have Q-Tips, a small brush, makeup pads, or cotton balls, for applying the acetone.
- Nail art requires patience and perseverance. Allow plenty of time to get it right.
Getting Started
Base Coast - Give your nails a good base coat with the colour determined by the look and design you are planning. A neutral varnish such as clear, white, light beige or pale pink, can be used as a universal base. You can apply two or three base coat colors to different parts of the nail to suit the design and speed up the art work. Apply two coats as it reinforces the art and provides a better finish. Make certain your "canvas" is tidy and has an even surface and is completely dry before proceeding.
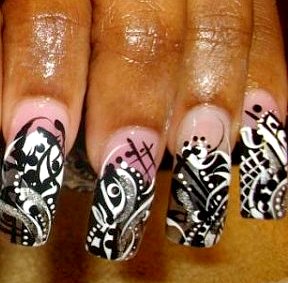
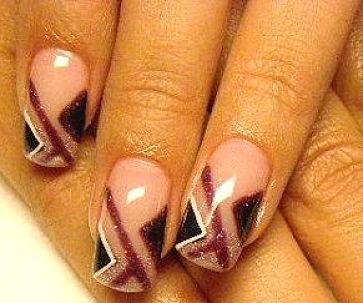
Art Layer - Nail art takes time and practice to develop your own style. Start with simple things like curved lines, stripes and spots etc. A good tip is to use a minimal amount of paint on the brush and don't overload it. To steady your hand try resting your arm on a table or some other object. Take your time and do not rush things. If your brush develops globs of paint or becomes overloaded, wipe it off as too much paint can be a disaster especially for fine work. Try to keep your art simple and apply all of one colour at a given time. There are many ways to be for creative using images or abstract designs. But don't make the mistake of making the images too "busy" or complex. You will learn that simple concepts are often the most attractive especially in such a small canvas.
Top Protective coat - Once all your nail art painting is dry, apply a protective coat over it a layer of clear acrylic. You will have to reapply the protective outer layer every two or three days to defend your nail art and keep it looking shiny. Also you should apply cuticle oil every day. Protect your Nail art and avoid risky activities. Always wear gloves when gardening or other work.
Design Principles for Nail Art
Painting Simple Objects and Designs
- Draw an outline of a simple design using a brush with a very thin tip or a nail art pen or even a toothpick.
- Paint within the outline using a slightly thicker brush. Only apply one color at a time, and always allow the outline and other colours to dry thoroughly before adding the next colour. Add additional colors and add various highlights.
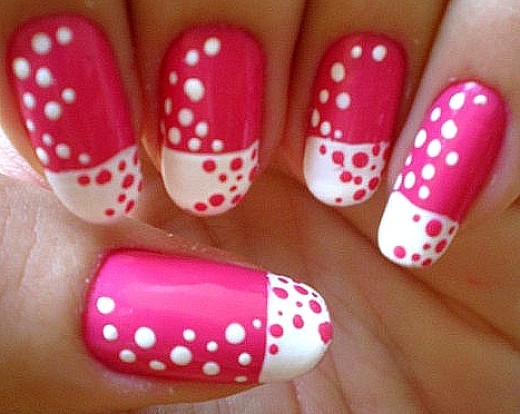
- You then can add simple dots often with multitude colours and sizes. you can use various implements such as a toothpick or a brush. Lightly touch the implement to the nail and allow to dry..
- You can use a series of dots to make various abstract designs and you can also make trailing dots. This is done by applying several dots without reloading with paint. The dots will get smaller and smaller as each dot is applied.
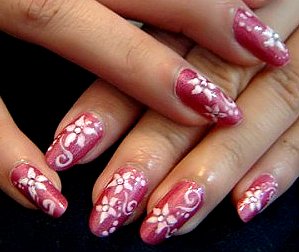
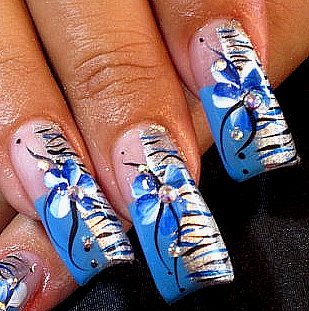
Making Floral Designs
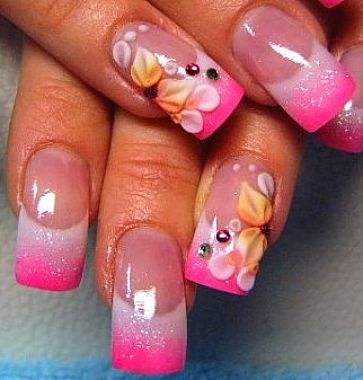
- A simple flower can be made by arranging five even sized dots in a circle to form the petals. Then add a dot of another colour in the centre. Add a stem by simply painting a curved green line leading away from the flower. A more complex flower can be made by tracing an outline and filling in the colour.
- You can add sparkles of colour on the petals using dots. You can also add stripes and dines down the petals.
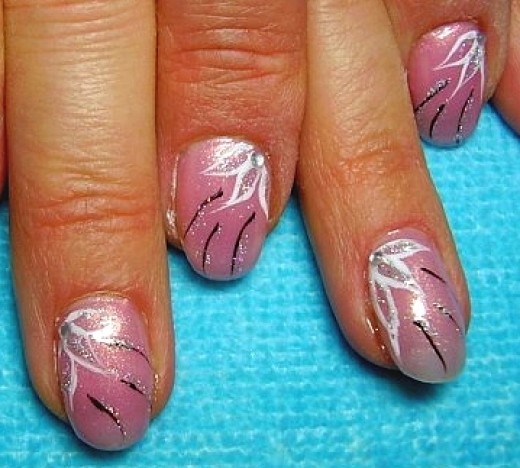
Making Leaves
- Using a tiny 'square' tipped brush, dip one corner or the brush into light green paint, and then dip the other corner into a darker green color.
- Make swish-like stroke like the famous Nike Symbol onto the nail to create the leaf. Try various angles until you get the desired effect.
Blending Colours on the Nail
- Apply a spot of one colour and then put another spot of different colour directly on top of the first spot while it is still wet.
- Using a striper brush or clean toothpick drag the pool of colours outward to swirl the dots together. To make a marble effect, randomly add several spots of one colour on the nail, then add various spots of another colour on top and swirl the spots around using a S-shaped, criss-cross or figure 8 pattern.
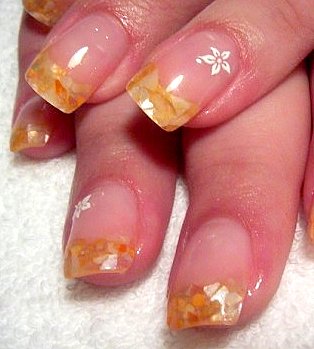
Applying Jewels or Stickers
- These can be applied using a special tool or tweezers. The item can be dipped into a drop of nail glue or gel. Place the sticker or jewel with glue applied flat down onto the surface of the nail. Press down gently and allow to dry.
- Apply a clear gloss top coat over the nail with sticker or jewel attached.
Guide for Creating Scenes and Images
Creating a Beach scene
- Paint the bottom half of the nail a darkish blue color to represent the sea, then paint the rest a lighter blue, for the sky.
- Take a light blue paint, and several narrow stripes across, to show the reflection on the water.
- Paint on an island, and then add a palm tree trunk and some leaves on top.
- For the sun - paint a white circle, fill it in with white . Let it dryn and then add a yellow spot for the center of the sun.
Applying Glitter
Method 1: Mix glitter with nail paint or gel. Dip a brush into mixture and brush it onto the nail in the shape or pattern you want. Let it dry and apply a top coat.
Method 2: Apply spots or swirls of nail gel onto the nail only where you want to apply glitter. Dust the nail with glitter and lightly shake to remove excess. Allow to dry, and use a toorthpick to remove any excess glitter that you don't want. Apply top coat.
Method 3: Cover the entire nail with gel or polish. Lightly dust with glitter. Shake to remove excess. Allow to dry and apply top coat.
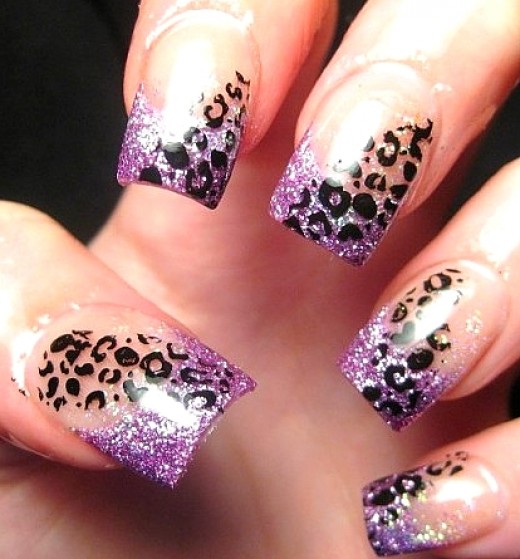
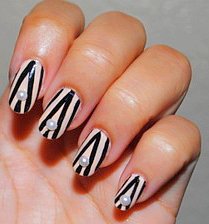
Create a Leopard Print
- Paint a gold or yellow base color onto your nail.
- Taking a slightly darker gold/brown/yellow color, paint on large spots, giving them a jagged outline.
- Taking a dark brown color, paint an outline around each dot. Paint this outline in three pieces, so that there are chunks of dark around the spots. Add random dots of dark color around the shapes. Finish with topcoat.
Create a Butterfly Design
- Paint on a light base coat color on your nail. Paint three dots, one big, for the head, and 2 smaller ones for the body in teh center.
- Loading a very small amount of black/white paint on the very tip of your brush, carefully and lightly paint a line, leading down from the head. Curve it into the shape of a butterfly wing and complete it by extending back to the body. Repeat for the other side.
- Do the same for the smaller wings, on both sides.
- Decorate your butterfly in anyway you want to, using any colors or patterns. Then finish by adding two thin swooping lines for the two antenna. Add a topcoat to the design.
- Another option is to use rhinestones for the body, instead of paint, or you could put rhinestones on the wings!
Creating a Playboy Bunny Design
- Paint on a base coat color. Using a fine amount of black paint on the tip, draw a circle. Then add curved lines, for the right ear.
- For the next ear, draw a curved line, beginning from the base of the other ear, and stretching out to the left. Using another curved line, begin at the base again, curve the line and join it to the other line you just painted.
- Starting at the bottom of the head, draw one line going down, and another line from the end of it, slanting back up. Next to that, draw another going down, then at the back of the shape, where the circle curves, draw another line going down. Join these 2 lines with a curved line. This is the neck and bow-tie of the bunny!
- Fill in the shape with paint. Adjust the shape of the bunny, so make the front of the head less curved by taking a brush, dipping it in the base color, and painting over it. Fill in the ears a bit, making them a little thicker, if needed. Adjust the proportions until they look good to you.
- Then, taking the base coat color, paint on a dot for the eye, or use a rhinestone! Take the color of the bunny, and carefully paint the bow-tie, which is basically 2 triangles, on their sides, joined together. Paint a line under the neck for the collar. Topcoat it!
Some Extra Tips and Guides
- You can use stencils or masks or airbrush your nails to create unique designs.
- You can make a more intricate and detailed flowers using larger dots made with a bobby pin or by using a toothpick to drag the dots into the centre.
- Add gems to the edge of your French manicure or paint a flag in the corner. Also, adding white flowers to any colored background is a classic look.
- If you want a design or picture that more intricate than what you can do on your own, but you do not want it done professionally you can buy stickers or pre-printed artificial nails.
Care and Precautions
- Acetone and many nail polishes give off fumes and are flammable. Use in a well-ventilated area, and avoid fire, sparks, or smoking around these products or while they are wet on your nails.
- Some people may be allergic to some nail products. If you experience an adverse reaction to a product, thoroughly wash your hands, use acetone to remove it if necessary, and discontinue using the product.