Best Image Optimizer for Websites - Simple, Free, Effective and Easy to Use
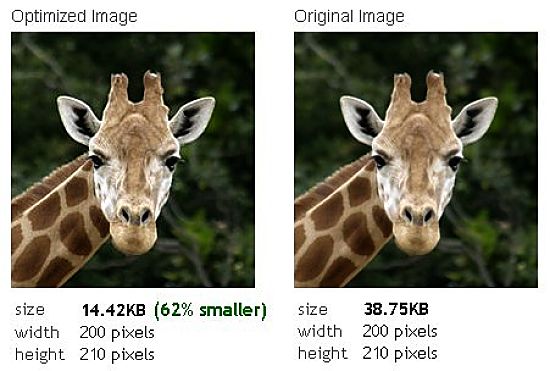
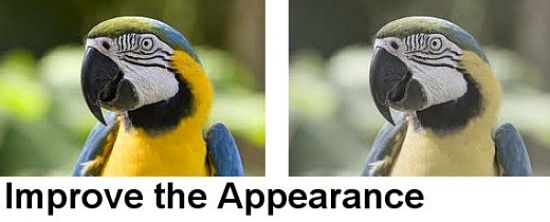
Reducing the size of graphics and images is a great way to make sure your website loads quickly, and if done wisely, will retain the appeal and attractiveness of the image on your Web page. Optimizing the contrast, brightness, color balance and sharpness of images makes them more appealing.
If you are adding images to a webpage the size of the image is critical otherwise they will take too long to load. Images should be less than 50 KB in size and preferably less than 20 KB. Most websites compresses the images you supply to it to a maximum of about 45 KB, even for the large, full width images.
One image I supplied which was originally 345 KB was compressed to 21 KB for a half size, right column image.
So the images you supply for websites (Your own or others)
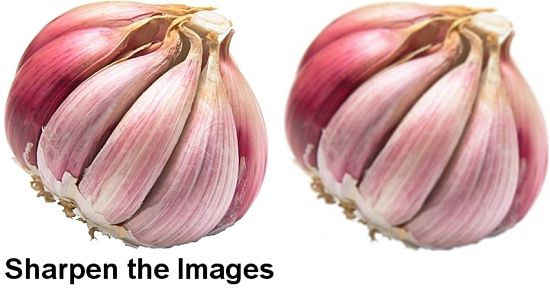
should be sharp, clear, bright and have good contrast, so that when they are compressed they will still look good in your article. If you are building your own website the same applies. You will need to optimize each of the images.


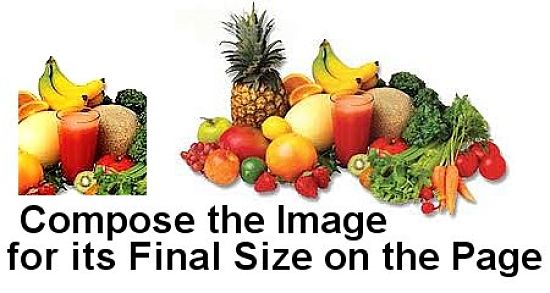
Cropping the Image and Composing for the Final Display Size
It is important that you compose and crop the source images so that they will be beautiful and effective at the final size they will appear of the webpage. There is not point optimizing a large image when all the detail will disappear when the image is reduced, and the major subject matter becomes too small to see. It is best to get the final dimensions and to reduce and crop the image down to that size, choose and appropriate composition for the subject and then optimize it in terms of quality, and compress to the size needed to load the page quickly.
Depending on the image involved and the techniques used, it's really fairly easy to reduce the size of graphics files by at least 50% without perceptibly affecting image quality. Savings of 75% and more are not uncommon. There are some great online and offline tools available for doing this and for optimizing the quality and appearance of the image.
Only Add Text to Images at their Final Size
Text becomes blurry and loses its quality when its reduced. You should only add the text after you have reduced it to its final size. You may have to redo the text to may it clear and sharp.
Understanding Image Formats
The vast majority of images on the Web are either JPEG, GIF and in some cases PNG. All of these formats are self-compressing, and all are platform-independent, which makes them suitable for exchanging images between servers and Web clients.
So Which Format Is Better?
When selecting a file format for graphics, there's just no easy and universal answer to this question. There are some general rules that you can apply, but experiment and see which one works best for you. Select the one that provides the smallest image without significantly compromising image quality. PNG may work best with very small and tiny images used for buttons etc. JPEG is probably the most easy format to work with for compression.
Compression
There are two major types of image compression, lossy and lossless.
Lossy compression means that if you decide to decompress the compressed data, you will not get back the same image as the original, but the differences may be small and not really visible. Lossy compression is good for web images, because the images can be compressed down to a very small size without losing much of the quality.
Lossless compressed means that if you decide to decompress the image will be exactly the same as the original. This method of compression cannot be reduced to very small file sizes.
Compressing JPEG files is lossy, and you can control the level compression using various image editors. It is a good option for images that have a large number of colors (millions), like drawings with many shades,photographs and images with gradients etc. It is probably a good choice if you what images with tiny file sizes.
GIF images are based on a bitmap, essentially consisting of a grid of many tiny pixel squares. Data about every single pixel in the image is saved, and so it's compression is lossless. Pixels may also be transparent. Compression of GIF files involves a reduction in the number of colours to reduce the size of the file. You will have to reach a compromise between between color fidelity and image file size. GIF it is a good format for saving web images with less colors, like charts, small graphic images such as buttons, bullets and thumbnails, images that contain text and other details, drawings etc.
PNG (also lossless) was created to become the new and improved GIF. PNG has greater color-depth than GIF, it can store partial transparency. You can achieve greater compression because there is a great depth of color that can be reduced. PNG is a good format when you need to preserve transparency and large depth of color, or partial transparency.
Optimizing JPEGs - With JPEGs you can control the level of compression (usually expressed as a percentage) and you should try different compression ratios to reach the required compromise. If you go too far many images will lose quality and become blurry and unappealing. Increase compression levels gradually (in increments of, say, 10%), until you see that the image is starting to lose quality, then ease back a little before saving the file.
Optimizing GIFs - Unlike JPEGs, GIFs do not allow you to control compression directly. But you can adjust its size automatically by reducing the number of colors in an image. This process is described as "palette optimization" or "reducing color depth". Most packages do this for you. Fewer colors are better than more colors in terms of file size. Use the lowest number of colors that retain the image quality, while reducing the file size to what you require.
Selecting Software
Fortunately there are many fantastic software tool available for for optimizing images, both in term of their quality and compressed file size. All the work is done for you automatically.
High-end and expensive fully featured image-editing packages such as CorelDrawand Adobe Photoshop (also available as an online tool) can be used for compression and quality enhancement of images for the web, but compression is only a small part of what they can do.
There are many specific purpose web image optimization and compression tool that may do a better specific job of optimizing images for webages, for only a fraction of the price. This article will focus on these options. These tools are free (or inexpensive) or available as online applcations. These tools are simple and easy to use.
These applications are available as both online and desktop-based applications that you download and install on you computer. I'll start with the ones I use.
The image optimizer I use after trying many of those available is: PhotoFiltre
PhotoFiltre is a free lightweight, download and install image editor that is simple and easy to use. It is very small and ca be installed an operate from a thumb drive, so that is completely portable. It is great for sharpening or softening the focus of the source image. It has a wonderful set of contrast, color editing and a fabulous cropping and resizing tool. It can deal with a wide range of image formats. It offers quick batch conversion and processing. It has: automatic and manual contrast, hue and saturation buttons, option for filtering and altering the colour balance, quick sharpen and soften burtons, and handles all the common formats.
The image compression tool I use after trying many of those available is: Webresizer
Webresizer is an online tool that may be hard to find in searches. It is a fabulous tool that offers side-by-side comparisons between the original and the compressed file. It has a wide range of options and tools you can try until you get the right balance.
The aspects you can change include: image size, rotate, sharpen, image quality as a percentage, apply a tint, adjust the exposure and contrast, and also the color saturation.
Website Planet Image Compressor is a good option for larger files up to 50 MB.
Some of the other popular free and inexpensive tools are:
Smush.it (Yahoo Tool) - is a "lossless" online compression tool. It attempts to optimize the images with minimal change their look, appearance and visual quality. After selecting the options the tool reports how many bytes would be saved by optimizing the page's images.
GIMP is free, however is a huge and comprehensive package, that takes some to learn and operate efficiently. Some people claim that it is better than Photoshop.
RIOT - Radical Image Optimization Tool - is a simple free and effective image optimizer that helps you to visually modify the various compression options to reduce the file size. It uses a side-by-side or single view interface to compare the original with the optimised image, in real time, and instantly shows the resulting file size. It is fast, lightweight, simple and easy to understand, yet powerful enough for advanced users. You can control the level of compression, metadata settings, number of colors and many more aspects, and select various image formats (GIF, JPG or PNG) for your output file.
Dynamic Drive Online Image Optimizer - An online tool that lets you optimize different image file formats such as GIF, JPG and PNG. You can either upload the image from your local machine or paste the URL of an image. This tool able to edit, optimize and convert your image to different file format.
PunyPNG is a free website optimization tool that dramatically reduces the file size of your images without any loss of quality. It compress PNG, JPEG, and GIF images using a variety of options
Image Optimizer is designed to generate the best possible GIF, JPG, JPEG, and PNG image file formats for the web. File size reductions can extend down to 50% or more
WebGraphics Optimizer - Most images can be greatly reduced in size, and you can instantly visualize the changes in real time, without having to download the results. You can see up to 5 variations and compare them before you save your image!
- Using this free online service, you can resize, compress and optimize your image files. You can also download a desk-top version for Free!
What is your Favorite Image Optimizer for Websites?
Related Articles
=> Q&A Landscape Photography Tips and How to Improve Your Vacation Photos
=> Q&A: How to Take Good Photos with Tips Tricks for Family Portraits, Groups
=> Web Search Tips and Tricks - Shortcuts for Quick, Efficient Searching
=> Benefits of Shopping Online - Advantages, Traps, Cautions, Pros, Cons